This is the first of a series of old consoles modding posts, some to add functionality and some purely cosmetic. I will start with the simplest of them all, changing the power LED of a Nintendo Entertainment System.
When the NES came out in 1985, electronic power LEDs used colors that were available at the time, red or green ones. Blue LEDs were not around at the time. They were invented relatively recent and they gave their inventors Isamu Akasaki, Hiroshi Amano and Shuji Nakamura, the Nobel prize in 2014.
Changing the NES power LED to blue, in my opinion gives the 80s device a more 21st century feel and it’s super easy to do. All you have to do is unscrew the NES, remove the mainboard and get to the POWER and RESET board on the left. Use a soldering iron to remove the existing LED, while bending it a bit to the back to remove it from the plastic clear channel.

At this point you are ready to put the new LED in. Just be careful with polarity. LEDs, as the D in their name suggests are diodes, which means there is a correct way and a wrong way to put them in the circuit.
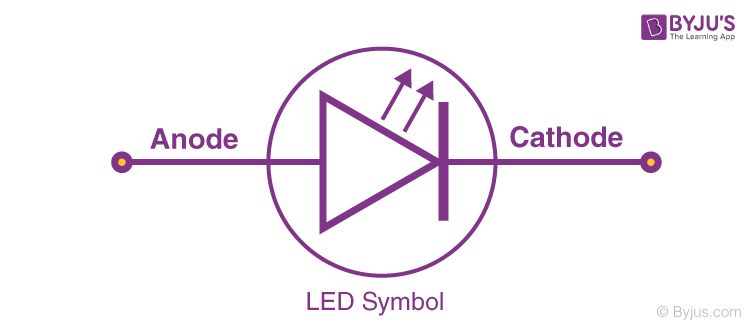
The LED symbol shows you the way. The Anode is where you need to use the long leg of the LED (positive) and the Cathode where you use the short one (negative). If you mess it up, it doesn’t hurt anything, but it will not light up, which is the whole point of a LED.
Solder the two legs at the bottom and bend the LED back in the clear channel.
If you get everything correctly and try to power up the NES, you will be greeted with a beautiful LED light. Put back everything and you should be done. Enjoy the 21st century light show!